
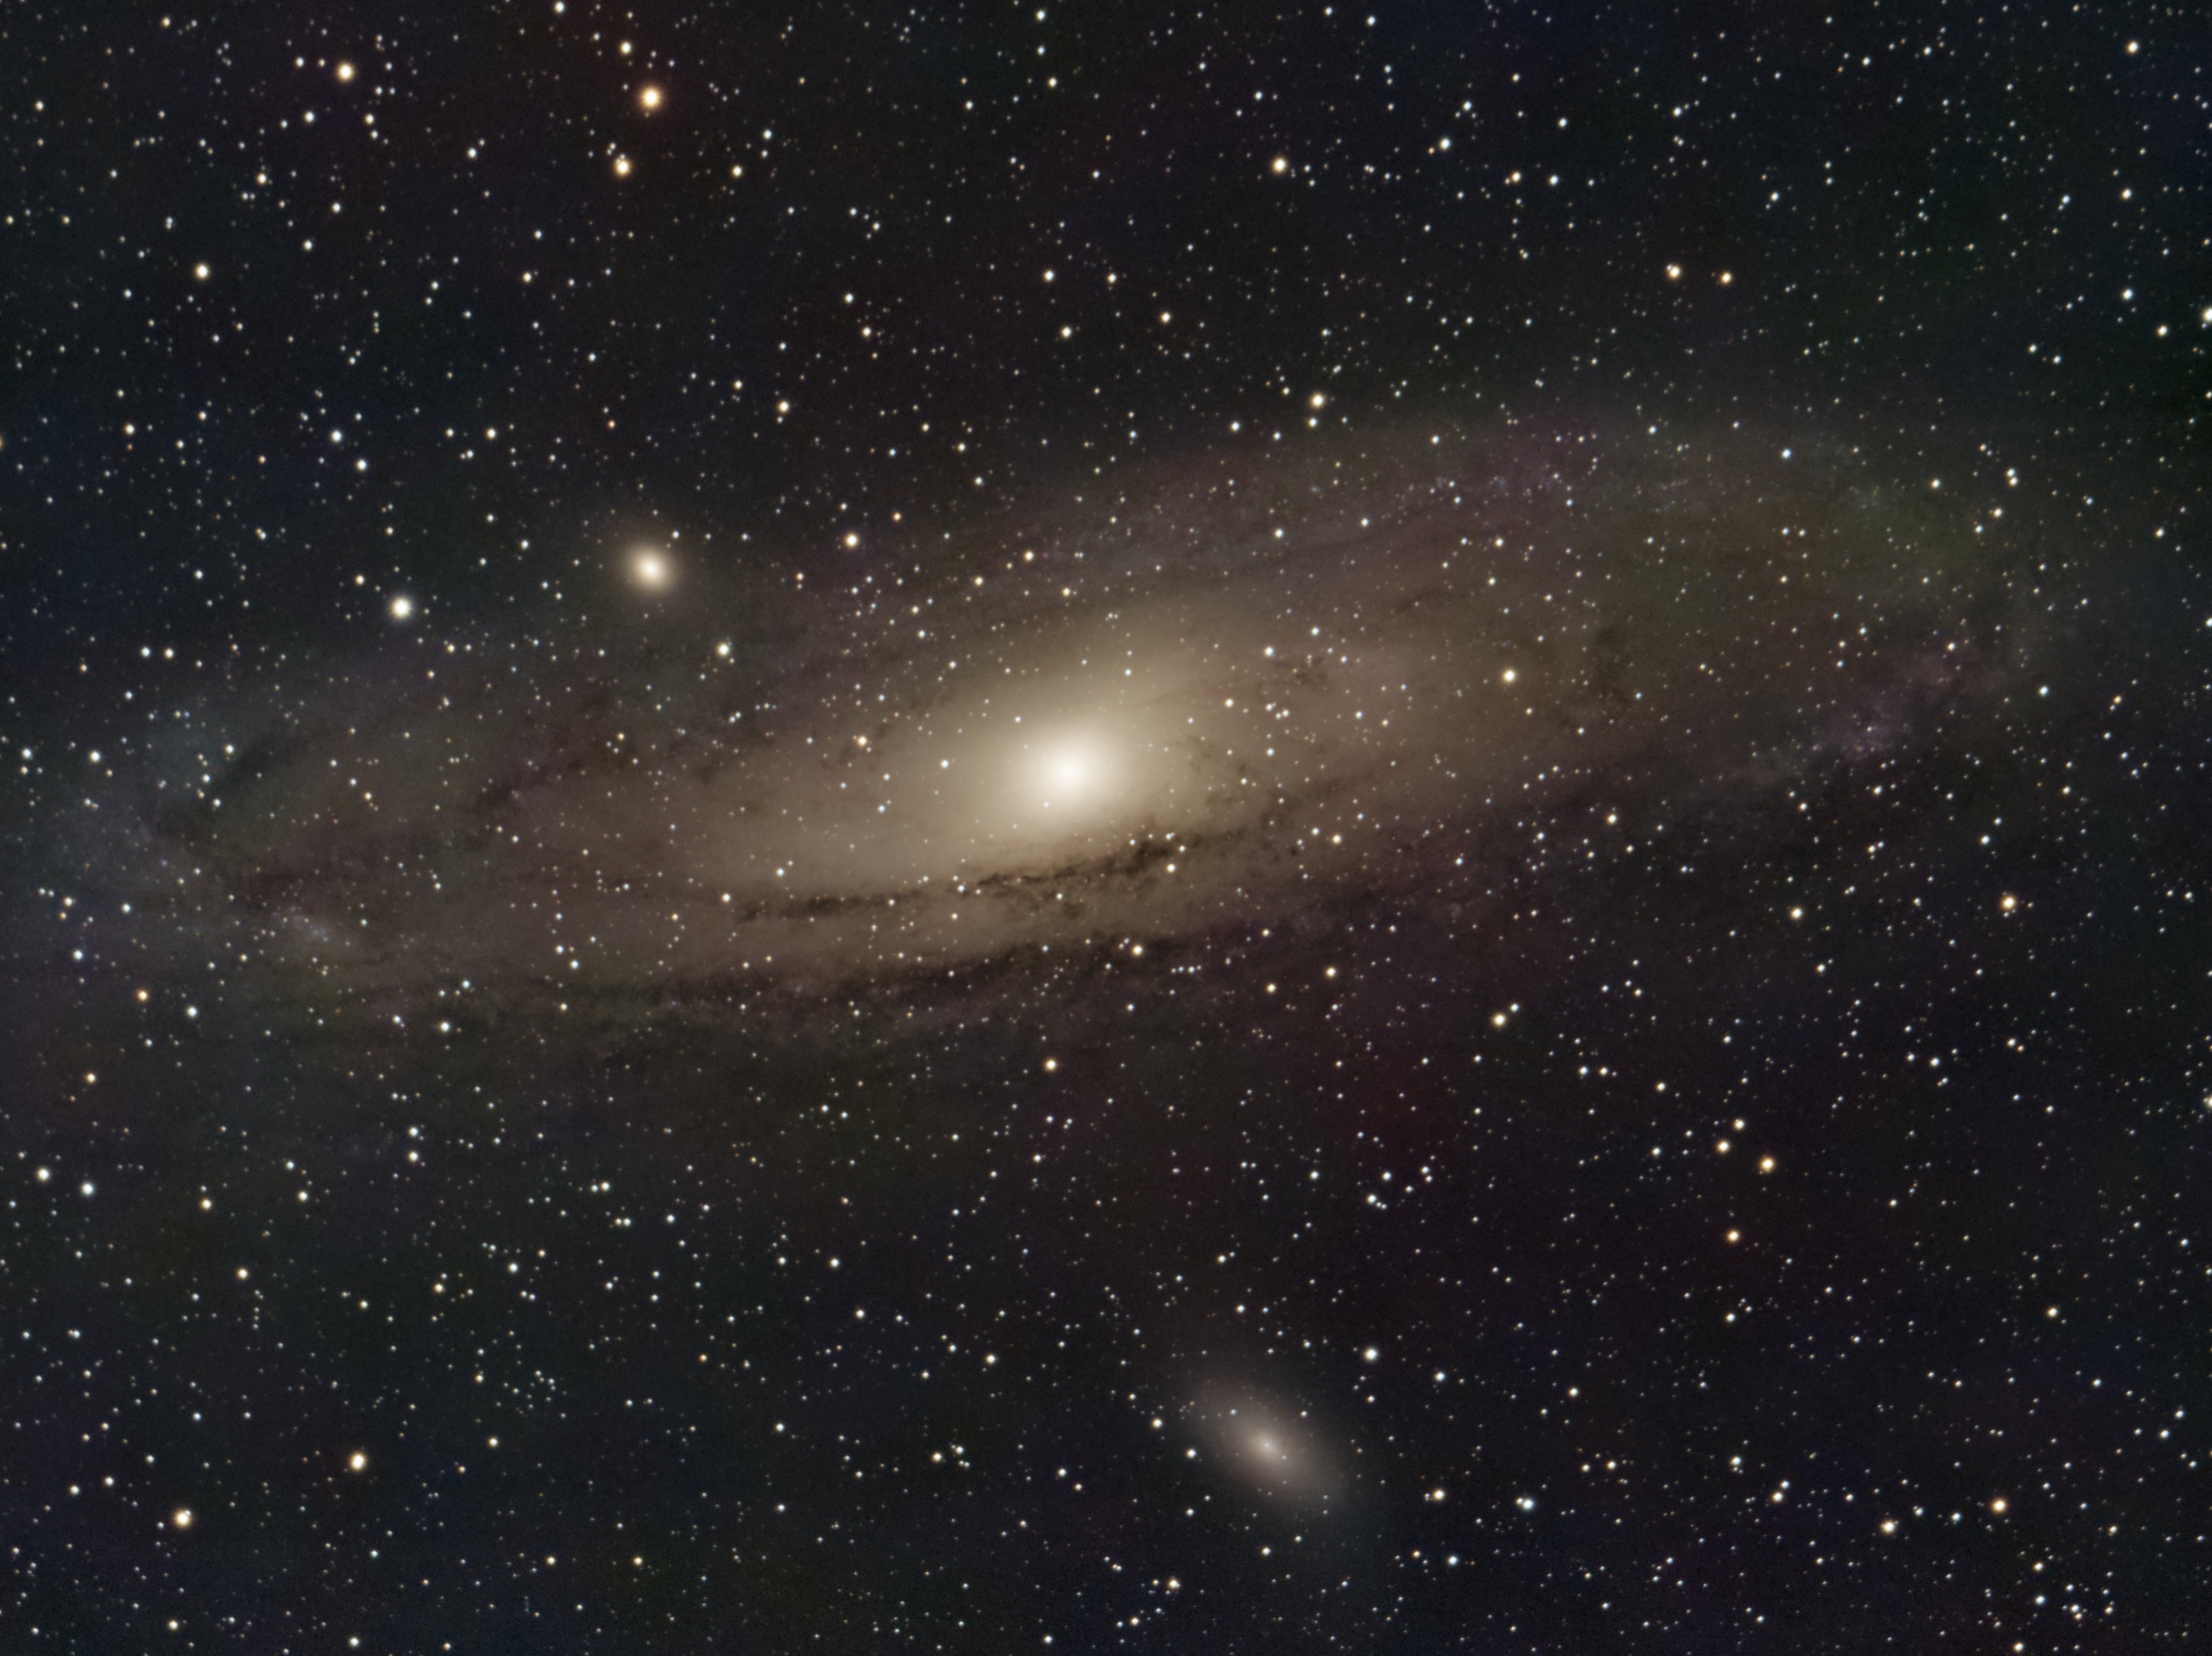
Messier 31 with Messier 32 & Messier 110
Although I had already gone through three attempts to process the M31 data I collected in December, I wasn’t happy with any of them. During this extended period of bad weather, I decided to make another attempt to see if I could put any of what I had recently learned about image processing to use.
What you see above is the result. I’m still out 100% happy with it but I suspect it is as good as the underlying data will allow. My problems with the earlier versions stemmed from two main issues: first was a fairly abrupt gradient in the final integration that was almost impossible to remove. It was caused by the mount moving from it’s intended positioning (something odd going on in Sequence Generator Pro’s Direct Mount Guider) and it really made it difficult to process. The second issue was a blotchy background that revealed itself after color calibration.
I went back to the raw data and used PixInsight’s local normalization and that made a huge difference in the gradient. It vanished. Gone. Kaput.
Unfortunately, the color blotchiness remained. I’m hoping this was due to my very short exposures (15s at 120 gain) and that it is really some kind of manifestation of read noise. However, it could also be a problem that seems to exist for at least some users of the ASI294MC Pro cameras. The next clear night I’m hoping to verify my theory and will write more about it then. But, for now, the question was how to deal with the blotchiness.
I used the ExtraceWavelets (or named something like that) script to break the image down into 10 layers. It appeared that the blotchiness seemed to live around layers 6 through 8. I attempted to use the MLT tool to do some fairly aggressive chrominance reduction on those layers and it helped some but I couldn’t go further without seriously reducing the color in the image.
I then proceeded to do a fairly normal processing. I used HT to stretch the image and then created two masks. The first mask was of the galaxy and stars created by making a luminance copy of the image and then using the range selection tool to create a mask from it. I also created a galaxy-only mask by duplicating the earlier mask and adjusting the range selection tools to eliminate the stars.
I used an inverted version of the galaxy+stars mask to darken the background until the blotchiness was no longer visible. This made the sky darker than I’d have preferred but did hide the blotches. Next I used the galaxy-only mask to use HDRMultiscaleTransform and LocalHistogramEquilization to bring out the contrast in the galaxy. This was followed by the EnhanceDarkStructures script and a bit of work with CurvesTransformation to adjust contrast and color saturation. Lastly I made a star mask to use MorphologicalTransformation to shrink the stars a bit.
Here’s the earlier version:

M31, the second attempt
And, the original version:
M31, The Andromeda Galaxy along with M32 and M110
I think I may have gone just a bit too far with this but overall I like it . I’ll have to live with it a while to see if I’m drawn back into yet another, yet another reprocessing…
Here’s the link to the image on astrobin.
